You have several options to record transactions in the app:
- In the Dashboard or the Transactions screen, by adding a completely new transaction or using an existing one as a template.
- In the Timesheet screen, easily adding transactions for selected matters and dates. This option is recommendable if you mainly work on a few matters during the week.
- With the “Quick Action > New transaction” button available in the menu.
- In the Matter screen, by selecting the Entries tab.
- Using the Timer.
In the Dashboard screen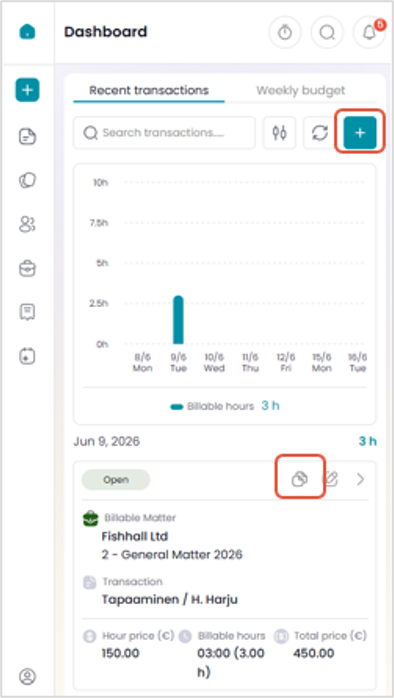
- Add a new transaction with the “+” button OR
Select “Use as template” to copy a suitable transaction, make the required changes to it and save.
This works well if you are adding transactions to a matter to which you have already recorded work during the last week.
In the Transactions screen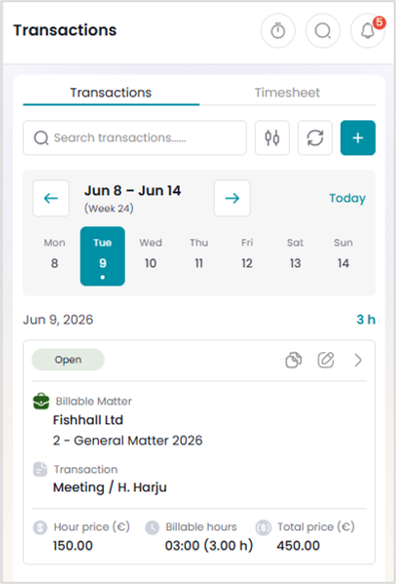
- View weekly transactions by swiping the calendar horizontally. The dates having transactions are indicated with a dot. Your transactions for the chosen week are listed below the calendar.
- Add a new transaction with the “+” button or by using the “Use as template” button.
In the Timesheet
In the Timesheet tab, you can easily add transactions to multiple matters and dates.
As rows, the timesheet displays all the matters to which you have added billable transactions during the week. If the list of matters is long, you can search for a specific matter.
- The colored “+” button above the time sheet enables adding new matters to the list.
As columns, you’ll see the last 7 days including the current day.
- Your total billable hours are summed up per day, and you can navigate between the days by swiping horizontally.
Each cell displays your total billable hours recorded for a specific matter on a particular date.
- Above the hour total, the number of transactions recorded in the matter is displayed.
- To view the transactions recorded, click the cell to open the transaction list.
You can add a new transaction by clicking on the “+” button in any cell.
- The selected date and matter are pre-filled and cannot be changed.
After completing and saving the transaction, the time sheet reflects the updated billable hour amount.
NOTE! Using the time sheet, you can only add transactions with hour-based transaction types. Thus, transactions recorded elsewhere in other units (e.g., units, minutes, days) are not displayed on the time sheet either.
Using the Quick Action button
The Quick Action button opens another menu from where a new transaction can be created. The menu is available everywhere in the app.
The button also allows you to add a new critical task, task, or work time.
From the matter screen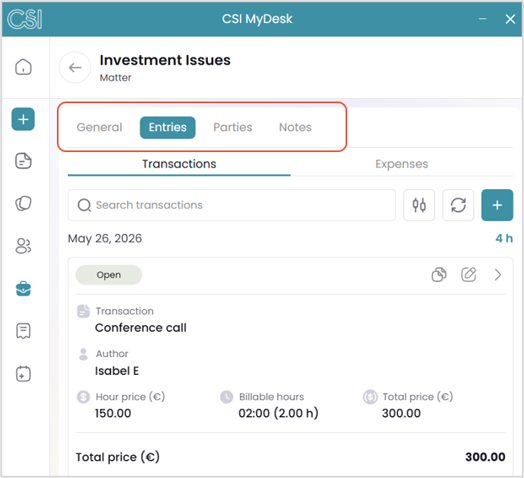
You can also add transactions from the matter screen (More > Matters) by selecting a matter and clicking its Entries tab open.
The Entries tab displays both transactions and expenses recorded in the matter. When adding a new transaction here, the matter information is prefilled automatically.
Using timer
To measure the duration of your transactions, you can select on the top menu the Timer button.
The Timer screen displays any open timers you have. The “+” button adds a new timer.
- Start by entering information for the timer. Click “Add timer” to open the actual timer screen.
- Now, start the timer with the
button.
- Stop the timer by clicking
.
- The “-5 mins/+5 mins” buttons enable adding/deducting time.
- The timer can be set to zero with “Reset”.
- With “Close” you can leave the timer without saving its value.
- “Save” opens a transaction screen where you can fill in the required details and save the transaction.
The application automatically records the time periods during which the timer has been running. You can view these time periods by clicking the three dots in the top-right corner of the timer.
If the timer is running, the application displays a ”Pause” icon. By clicking it, you’ll see the list of timers.
Managing multiple timers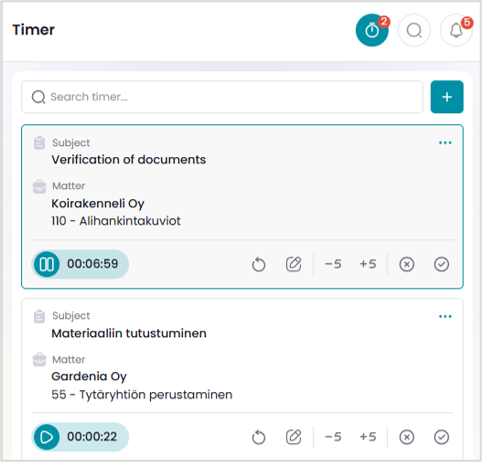
If you work simultaneously on several tasks, you can measure their duration with multiple timers.
New timers are opened by selecting the “+” button next to the “Search timer” field.
The app lists all the timers on the Timer screen, and the Timer button on the top menu indicates the number of open timers.
However, you can have only one active timer at a time. When you start one timer, the one that was previously running stops.
Comments
0 comments
Please sign in to leave a comment.